Before starting setting up your Part Request Portal (PTP), please check out this article: Click here
Production Options, Templates, and Analysis Profiles play a crucial role in the functionality of 3D Spark. We encourage you to take a moment to read this brief article for a clearer understanding of these key concepts.
Step 1
Begin by adding your machines to the system: Guide
Step 2
Next, add your available materials: Guide
Optional Step
If you wish to evaluate your costs and establish pricing based on them, please refer to the guides in the section titled "Simulate Your Production Reality." However, if you have a pricing model that operates independently of your costs (such as one based on a mathematical formula related to part volume or bounding box dimensions) feel free to proceed directly to Step 3.
Step 3
Configure your pricing settings: Guide
Step 4
Add a specific part and select your Production Options based on the materials you have entered: Guide
Step 5
Make sure to assign the appropriate Pricing Configuration to each of your Production Options: Guide
Step 6
Save this set of Production Options as an Analysis Profile and designate its Restriction as "Online Showroom"
Step 7
Go to Settings > Online Showroom Settings > Production Offers

Step 8
You can assign filters to your Production Offers. These filters will be visible to the (internal or external) customers in the Part Request Portal.
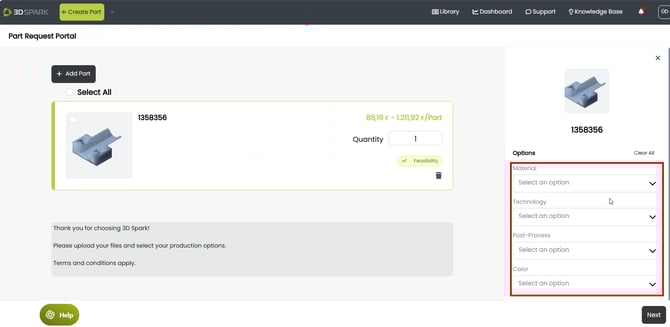
How the filters will be seen by PRP users:
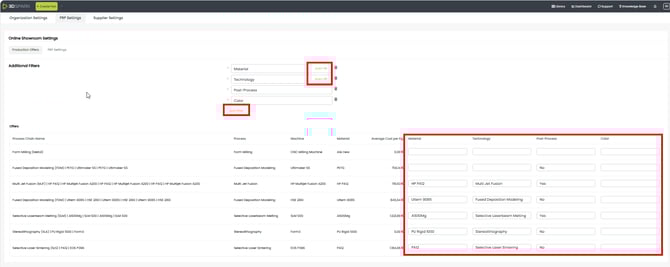
How to set up Filters:
Material and Technology can be auto-filled based on the Production Option. The rest of the filter content must be filled in manually.
Step 9
Go to Settings > Online Showroom Settings > Part Request Portal Settings

a. You can set up your Category Fields. These fields help you collect information from the PRP users before they send the request:
How to set up Category Fields
You can add Text, Dropdown (Options) or Date type of fields:
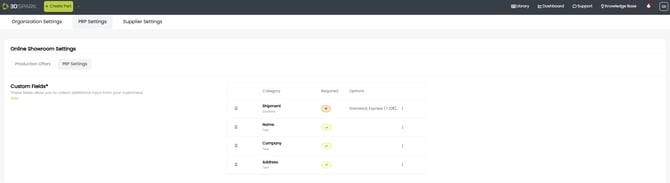
You can designate a Field as "Required", so that the PRP user cannot send the request unless they fill in this field.
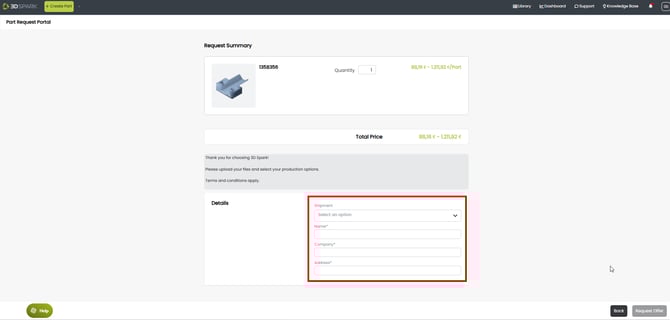
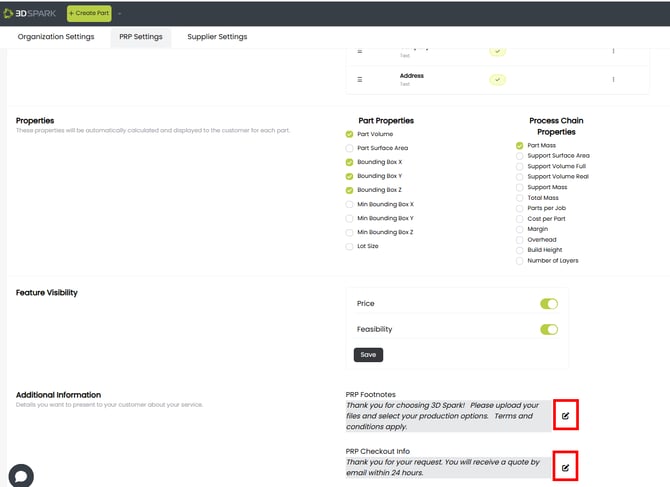
b. You can set up what kind of information should the visible to the PRP user.
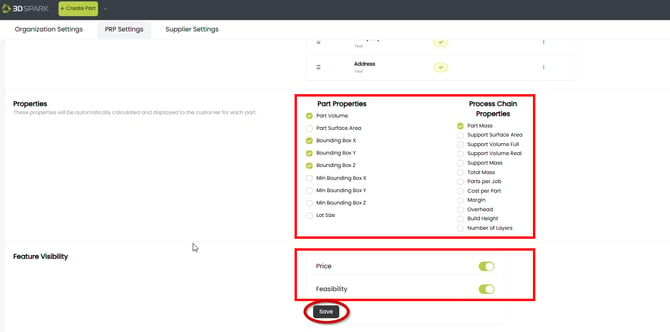
Click Save once finished.
c. You can customize the text in the input page and the text that comes up after the PRP user sends the request.
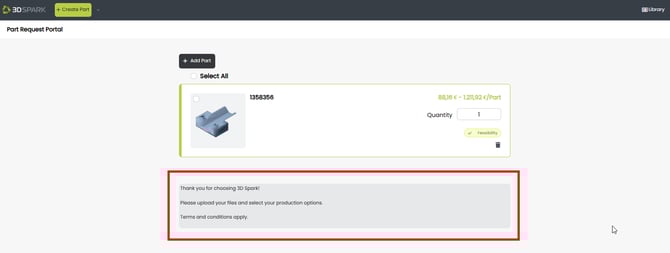
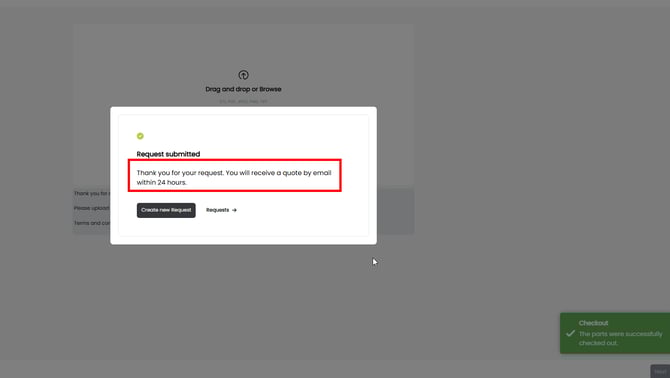
How the text will be seen by PRP users
How to set up the communication text
Step 10
Your Part Request Portal is ready and online.
To test it, click the arrow next to Create > Create PRP Part

Step 11
Integrate PRP into your website. If you booked a custom domain (e.g. yourbusinessname.3dspark.de), please contact 3D Spark Support to activate it.