Additive manufacturing delivers its biggest gains only when you choose the right parts. In most factories those opportunities hide inside thousands of ERP lines and CAD files. The Part Screening workflow reads both datasets, links each geometry to real production cost models, and highlights where AM can shorten lead-time or lower unit cost. Upload a batch of parts once, and the platform returns a ranked shortlist with clear explanations of the savings and feasibility, letting engineers focus immediately on validating the best candidates instead of hunting for them.
0. Before you start
|
What you need |
Why it matters |
|
✔️ Clean CAD files (STEP, STL, 3MF, OBJ) |
Geometry drives every cost & feasibility calculation. |
|
✔️ ERP export (CSV / XLSX) |
Key parameters, including material, lot size, current manufacturing technology, and pricing, are extracted for analysis. In cases where a CAD file for a part is unavailable, the ERP data can serve as a reliable alternative for evaluation. |
|
✔️ Excel (desktop) |
Used once to marry metadata with file paths. |
|
✔️ Access to 3D Spark with Manager rights |
Enables set-up, upload and analysis. |
IMPORTANT NOTE: 3D Spark is capable of analyzing your ERP export spreadsheet, filtering out parts that do not meet the necessary criteria, and linking CAD files and technical drawings to the part names listed in the spreadsheet. For assistance with this process, please reach out to the 3D Spark Team to schedule a support service. Alternatively, if you prefer to undertake the process independently, you can follow the guide provided below.
1. Link CAD‑file names to part IDs
- Export the parts you want to screen from PLM/ERP.
- Filename convention: PartID.xxx (e.g., 123456.step).
Keep every CAD file in one working directory for the upload.
2. Link Technical Drawing names to Part IDs
- Bulk‑export the technical drawings you want to attach to CAD files from PLM/ERP.
- Filename convention: PartID.xxx (e.g., 123456.tiff).
Keep every drawing file in the same working directory as the CAD files.
3. Make results more impactful
3D Spark is designed to help you automatically assess the economic, technical, and overall suitability of additive manufacturing (AM). Just make sure your organization has these information fields ready to go beforehand!
- Navigate to the top-right corner of the platform > click on your initials > select 'Settings' > proceed to 'Category Settings' > click on 'Add.'
- Name: Economic Suitability
Type: Options
Options: Yes, No Maybe
- Repeat step 2 for Technical Suitability and Overall Suitability
Enter the category names and options without typos or extra spaces to avoid any errors.
4. Curate the Library view
Library > Parts > ⋯ (three dots top‑right) > Edit Columns > All Columns
Enable only these columns:
- Thumbnail
- Name
- Lot Size
- Material
- Process
- Cost p.P.
- Total Cost Saved p.L.
- Economic Suitability
- Technical Suitability
- Overall Suitability
5. Production options & Analysis Profiles
Production options:
- If you want to model your in‑house pricing, follow the Self‑Onboarding guide: Click
- Otherwise, activate the default 3D Spark materials that are relevant to you (Library > Materials > Search > ★ Favourite).
Create Analysis Profiles:
An Analysis Profile consists of various Production Options and is essential for the part screening project. During the batch upload process, each part can be automatically assigned an Analysis Profile. Therefore, it is necessary to create at least one Analysis Profile to ensure an effective screening of parts.
Learn more about Production Options and Analysis Profiles here.
Follow these steps to save your Analysis Profiles:
- Click Create (top-left) > Add at least one (dummy) part so the profile can be saved.
- Go to Analyze page > Click Add production option > Add your production options from Template or from Material.
We recommend using these production options for your profiles:
Profile
Conventional options
AM options
Polymer
- Polymer Milling (Polymer) - PA6
- Injection‑molding (PP)
- SLS (PA12)
- MJF (PA12)
- FDM (PETG or ULTEM)
Steel
- Form Milling (Metal) - V4A
- Investment casting - G X 5 CrNiMo 16 5 1
- SLM (316L)
- Binder Jet (316L)
Aluminium
- Form Milling (Metal) - AlMgSi
- Investment casting - AISi7Mg0,6
- SLM (AlSi10Mg)
- Once finished with adding the production options for a profile, click "..." (next to Analyze All) > Save as Profile.
- Name the profile clearly (e.g., Polymer Profile).
- Set 'Access' to 'Organization' > Save.
- Repeat Steps 1-5 for Aluminium and Steel profiles.
- Note each profile’s ID: Click Add production option > Click the "..." next to the profile you have just created, copy the ID and paste it to a table (paste as plain text because the copied text is white). The table must look exactly like this:
| Polymer | the profile ID here |
| Steel | the profile ID here |
| Aluminium | the profile ID here |
6. Build the Excel upload sheet
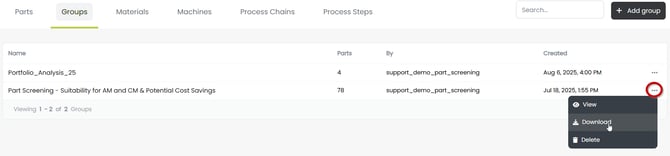
- Create a new Group (Top-left of the platform > Create ▼ (click arrow) > Add Group) and click Download Template.
- Add a new tab in the Excel file called Profiles; paste your Profile table (Profile Name + Profile ID) starting in cell A1 of this tab. Do not use any headers.
- Switch to metadata tab; insert a blank column to the beginning of the table (Column A).
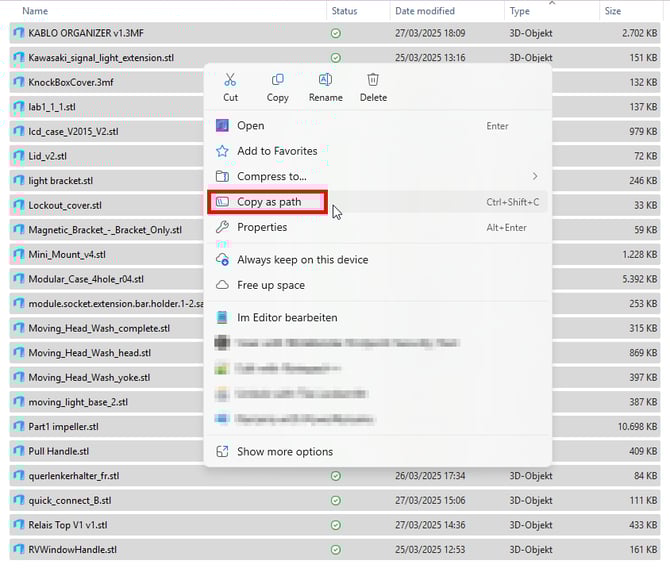
- In Windows File Explorer, select all CAD files > Right-click > Copy as path > Paste into cell A2 in metadata tab.
- Create a new tab in Excel called "Drawings"
- In Windows File Explorer, select all technical drawing files > Right-click > Copy as path > Paste into cell A2 in Drawings tab.
Formulas to copy
Enter these formulas to both metadata tab and Drawings tab:
- Cell C2 (in metadata under the header cad)
- English (comma): =TRIM(RIGHT(A2, LEN(A2) - FIND("~", SUBSTITUTE(A2, "\", "~", LEN(A2) - LEN(SUBSTITUTE(A2, "\", ""))))))
- English (semicolon): =TRIM(RIGHT(A2; LEN(A2) - FIND("~"; SUBSTITUTE(A2; "\"; "~"; LEN(A2) - LEN(SUBSTITUTE(A2; "\"; ""))))))
- German: =GLÄTTEN(RECHTS(A2; LÄNGE(A2) - FINDEN("~"; WECHSELN(A2; "\"; "~"; LÄNGE(A2) - LÄNGE(WECHSELN(A2; "\"; ""))))))
Explanation: This formula is designed to extract the CAD file name from the Windows path that you pasted to column A. Output example: bracket.step
- Cell B2 (in metadata under the header name)
-
- English (comma): =LEFT(C2, FIND("#", SUBSTITUTE(C2, ".", "#", LEN(C2) - LEN(SUBSTITUTE(C2, ".", "")))) - 1)
- English (semicolon): =LEFT(C2; FIND("#"; SUBSTITUTE(C2; "."; "#"; LEN(C2) - LEN(SUBSTITUTE(C2; "."; "")))) - 1)
- German: =LINKS(C2; FINDEN("#"; WECHSELN(C2; "."; "#"; LÄNGE(C2) - LÄNGE(WECHSELN(C2; "."; "")))) - 1)
Explanation: This formula is designed to give each part a name in 3D Spark platform. It gets the content of column C and removes the file type extension. Output example: bracket
Only in metadata tab:
- under column analysis_profile_id
- English (comma): =VLOOKUP(D2, Profiles!A:B, 2, FALSE)
- English (semicolon): =VLOOKUP(D2;Profiles!A:B;2;FALSE)
- German: =SVERWEIS(D2; Profiles!A:B; 2; FALSCH)
Explanation: This formula is designed to link each part with its appropriate Analysis Profile. After specifying the correct material type for each part (as detailed in the 'Fill other cells' section below) the corresponding Analysis Profile will automatically populate the analysis_profile_id column. For now, it's normal that the formula does not give any meaningful value.
- under column drawings (not the tab Drawings)
- English (comma): =VLOOKUP(B2, Drawings!B:C, 2, FALSE)
- English (semicolon): =VLOOKUP(B2; Drawings!B:C; 2; FALSE)
- German: =SVERWEIS(B2; Drawings!B:C; 2; FALSCH)
Explanation: This formula is designed to match each part with its corresponding technical drawing. It searches for the part name and retrieves the technical drawing that shares the same name, ensuring that the correct reference is linked for each component.
Fill in other cells
- Drag all formulas down to cover all rows.
- Enter the lot_size for each part, preferably using data from your ERP system or based on your annual production requirements.
- Fill current_mat for each part with the most suitable material: Polymer / Aluminium / Steel. Make sure the spelling is correct, as this text will be used to assign the correct Analysis Profile to each part.
- part_stat = validated (all rows)
- start_analysis = True (all rows)
- Insert a new column at the end of the table and give it the header:
suitability_checks
Fill all rows with the value True
This setting will let 3D Spark to evaluate Economic, Technical and Overall Suitability (See also the section Make results more impactful.)
- Optional: Assign the correct Category Fields for each part (columns with the header combo_category_xxx). If you have this information in your ERP export, you can use VLOOKUP function of Excel to match them automatically, using your ERP export.
- Save the Excel file in the same folder as your CAD files and close the file (closing the file is important).
7. Bulk‑upload parts
- Create a part group: 3D Spark > click + Group (top-left) > Name it.
- Drag‑and‑drop all CAD files + technical drawings + the Excel file into the uploader simultaneously. It is critical to select these files and add them to 3D Spark all at once.
- Keep the upload manager window open until every file shows 100 %.
- Monitor the progress until the analysis is complete. You will not be notified when the analysis of all parts are finished. The duration for uploading and analyzing parts may range from a few minutes to several hours, depending on the quantity of parts being processed. For a batch of 100 parts, you can generally expect the process to take around 30 minutes.