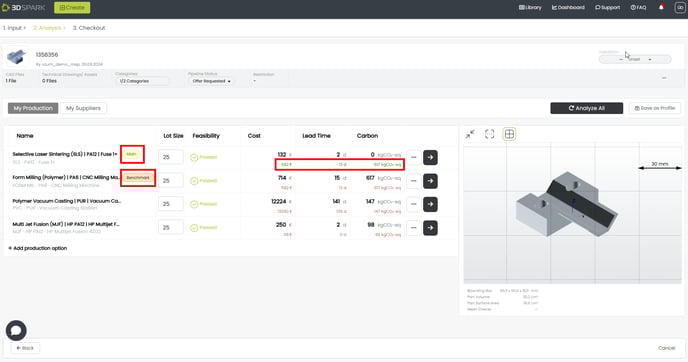
Potential cost and lead time savings are calculated by 3D Spark after each analysis. These potential savings are calculated based on the “main” and the “benchmark” production option (see above).
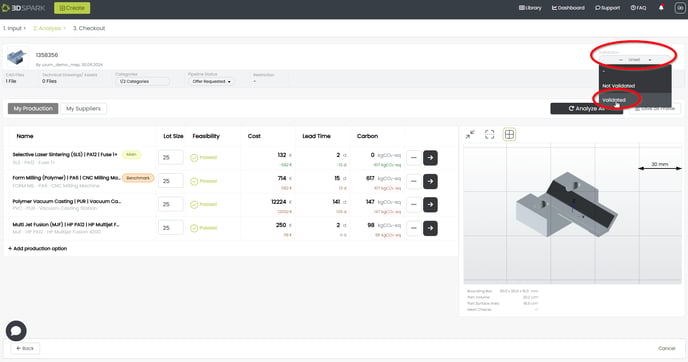
Once these potential savings are realized, the user (usually part owner or manager) should “validate” these savings. This way potential savings and and actual savings can be distinguished.
If the savings are not validated, cost and lead time savings will not be visible in the part library and they will not be taken into account in the dashboard reports.
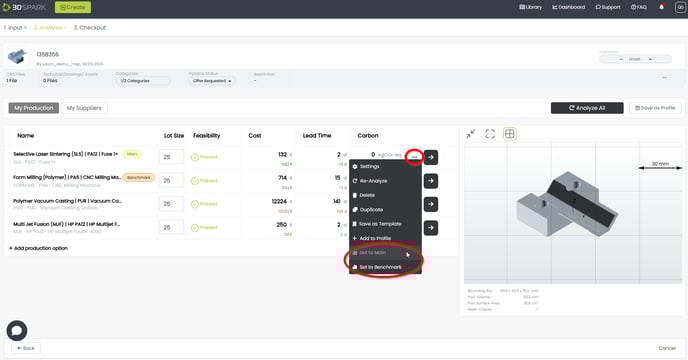
You can assign a production option as “main” or “benchmark”.
Main: This production option is selected or being considered to be used.
Benchmark: I want to compare my “main” production option with this “benchmark” production option in terms of cost, lead time and carbon footprint.
If you would like to track your cost, lead time and CO2 savings, one production option must be designated as “main” and another one as “benchmark”. You should then “validate” these cost savings once they are realized (see below).
Not always but most of the time “benchmark” is a conventional production technology and “main” is an alternative technology i.e. an additive manufacturing technology.
A production option can be set as 'Main' or 'Benchmark' via the three dots next to it:
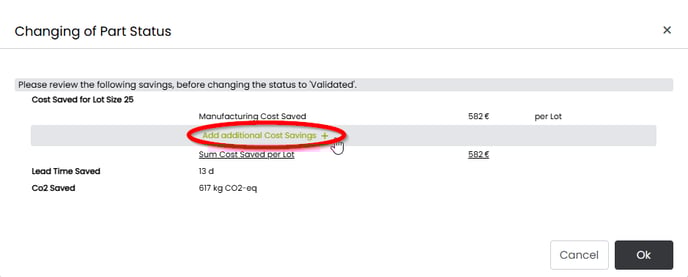
Validating the part
In order to confirm these savings and add additional savings, you must validate the part:
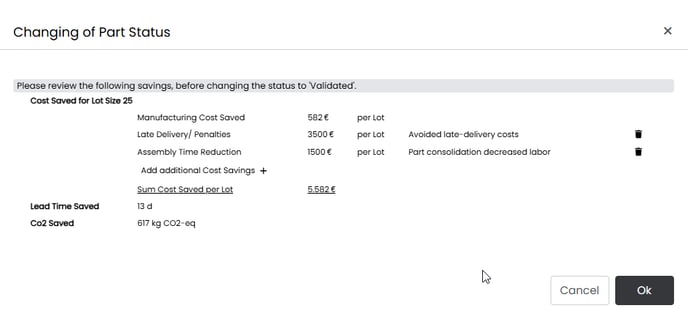
Additional cost savings
If a production option costs less than the benchmark process, that’s good. Even better is if there are additional cost savings due to light-weighting, less CO2 footprint, avoiding late deliver fees etc. You can also record and track these savings in 3D Spark:
Do not forget to click on the check sign before clicking Ok:
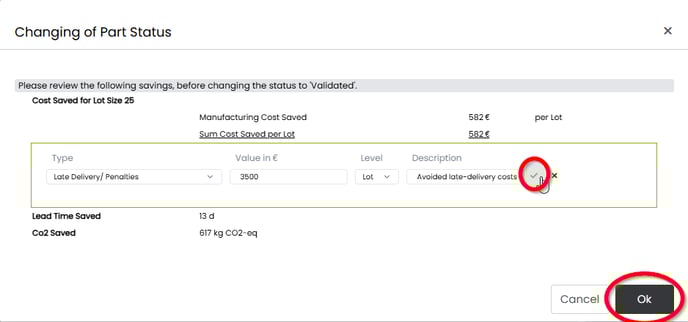
You can add multiple types of additional cost savings: